So my vehicle for the last 8 years has been a 2002 Ford F-150 XLT, with a 5-speed. This was my first mostly new vehicle, that I purchased with less than 3,500 miles on it. Apparently the former owner, who had to special order the 5-speed, decided he no longer liked the manual tranny. The truck has basically been great. I had two coil packs go bad, and then normal wear items, like suspension components, brakes, and tires. I now have 175,000 on the clock and hoping to get another 10-20,000 miles before I have to get rid of it. I have been a fair number of places, and had many good experiences with the truck, but as a daily, reliable, long distance, commuter vehicle, I think we are on the downward trend. Enough of the sentimental nonsense.
It was a typical weekday and I was headed to work when I stopped for fuel at a gas station off the highway. I filled the tank got in started the truck and bang, I heard a mini-explosion that made me a little nervous plus a god awful clunking sound. I shut the truck off immediately and got out expecting to see a big puddle of oil and parts of the engine all over the place. I looked under the truck and saw nothing. Not the best way to start a day.
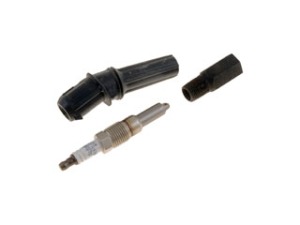
Fortunately the mechanic had seen this before, and just happened to show up minutes after this happened. He diagnosed it as a blown plug, not hard when its hanging by the coil pack on top of the engine. He ordered a temp fix to get me home, a Dorman No. 42025 tapered threaded insert with an extra long plug. Once installed we started the truck and heard the tell-tale ticking noise, similar to an exhaust leak, of the plug getting ready to go again. I threw caution to the wind, limped to a meeting I had in Boston, and thanked my luck stars that I did not break down in the underground garage, or on my way home in bumper to bumper traffic on I-93. Once home I let the truck idle with hood open, I heard the ticking and put my hand on the top of the coil pack of the number 2 cylinder. I could feel it moving on every compression stroke. The temp fix was about to fail. That prompted my research.
After a couple of days researching my options on various F-150 forums I came across several posts and recommendations on repairs. The overwhelming majority of people agreed that the Timesert insert & repair kit is the best repair for this problem. That prompted my search to buy the kit. The closest place to buy the kit is BelMetric.com in Massachusetts and the kit is listed at $375 online, plus shipping unless I could pick it up.
This was going to be my only option until I read another post on the F150online forum, where a forum member bought the tool and was renting it out to people who needed it for a modest fee. I made the inquiry and was emailed all costs, his rental fee, and was informed that I was second in line for the tool. Go figure. Fees for the tool are shipping via USPS flat rat boxes at $10.95 both ways, rental is $80/week once received, and $15 per additional insert beyond the first. Methods of payment are check, money order and paypal. For paypal you are responsible for all transaction fees (3%).
Tools required are basic ratchets & sockets, a torque wrench, a step stool, and a lot of various extensions & wobbles are a must.
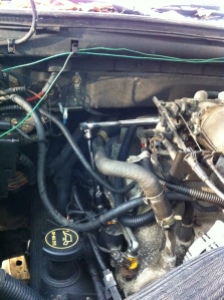
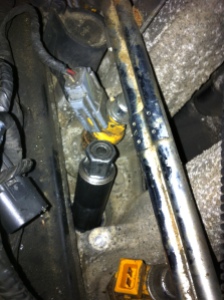
Step one– I removed the coil pack which is a 7mm bolt and a simple electrical disconnect. To make life easy I disconnect the electrical connections for the injectors on cylinder 1 and 2 to get those out of my way. All my work is on cylinder #2 which is the 2nd back from the front of the engine on the passenger’s side. The attached photo shows a ratchet angling down to the spark plug hole. Once the coil pack is out, I had to remove the repair insert and plug.
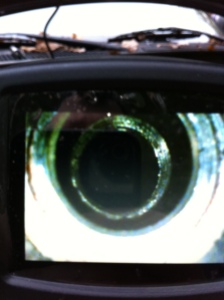
Step two – with the plug removed I had to make sure the valves & piston were out of the way. I borrowed a borescope to help see into the cylinder to make sure the valves were closed and that the piston was out of the way before starting the repair. The other two options for confirming this from Timesert’s instructions on their website would not work for me. The 1st way was to remove the valve cover. This sounds easy but I am doing this repair over the fender outside and on the 4.6L V8 some of those bolts for the valve covers are tucked deep inside the firewall, and it was just not something I wanted to tackle. The 2nd option involves holding your finger over the spark plug hole to feel the air being pushed out on the compression stroke while someone turns the engine over. This may be possible if I knew someone without stubby sausage fingers like myself who wanted to come over and wrench on a truck. I elected for the technology option. The camera I used had a detachable screen so I was able to set the camera up and take the screen with me below the truck as I cranked over the engine manually with a 24″ breaker bar and 18mm socket in a clockwise direction. (Tip – make sure your tranny is in neutral, parking brake applied and the wheels chocked, it makes it possible to turn the engine over.) As I turned the crankshaft I watched the valves and piston move through a couple different cycles to make sure I knew where I was in the 4-stroke process to confirm what I was seeing in the camera.
Step four -ream the spark plug hole with the stepped reamer. Same process as the counterbore. Lots of grease, lots of cleaning with paper towels, and lots of time. I would say 1 hour start to finish. It’s at this point that I was starting to get exhausted with the whole photo documentation process. So I am lacking some photos of the tools/progress, due to lack of patience. I am a good 5-6 hours in by this point.
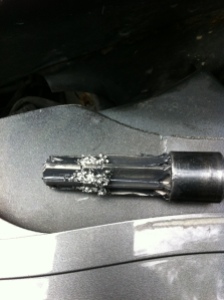
Step five – tap the reamed hole with the provided tap and some grease. One cool thing about this kit is the alignment. The wrench that all these tools go into is the same size as the depression in the intake manifold so all of your boring, and tapping stay centered and in perfect alignment. You can see the wrench in the photo below.
Step six – after tapping the hole, you thread in the insert with some red lock-tite to about 20 ft/lbs. After setting the insert, you run a “driver tool” through the insert which cold rolls the bottom threads of the insert locking it into place. Below is a photo of the completed repair, minus the plug.
Step seven – vacuum out or used compressed air to blow out any shavings that may have fell into the cylinder head. I used a combination of plastic hoses attached to a shop vac and my pancake air compressor to accomplish this. Lastly gap and install a new plug, re-install the coil pack and reconnect everything you disconnected and away you go.
Hope the photos help with what to expect doing this repair. Prior to this my shade-tree experience was tie rod replacement, and brakes. I had a unique situation having the borescope so I figured I would take some photos, because I did not find any real photos of the process on the net.

